As an Amazon Associate I earn from qualifying purchases.
Those gorgeous photos you see on Foodgawker, Tastespotting and other “food porn” sites often look as if they just are merely taken in someone’s kitchen or dining area. That’s the effect you want, but it’s rarely ever true.
A great deal of thought and quite a bit of artistry goes into that final product.
First you start with the food you want to photograph. Next you have to think about the overall color of that food and what colors and textures will complement it and make it really stand out and sing. This is the point that you choose your props/garnishes/backgrounds/surfaces/textures, et.al. This list can go on and on.
In my shot of the quinoa salad, I knew the overall color of the food was neutral, so I wanted to introduce some bright, vibrant and appetizing colors. This was pretty easy because it contained bacon (which is mainly neutral with the beige of the quinoa) and mostly because it contained sugar snap peas…a nice vibrant green. I chose a wooden (well actually bamboo) cutting board as my base and a simple wooden salad bowl to feature the salad. The running theme here is nature, wood, and healthy. You also have to think of lighting at this point. Light has COLOR (remember your elementary physics here). I wanted sunny natural light to give this a yellowish hue because of the rest of my elements in the photo. Remember, light IS your photo.
Next, I chose to keep the wooden theme with a small wooden craft crate I’d picked up years ago at the dollar store. That crate sits on my porch conversation table to organize stuff like pens & pencils.
Since the dressing contained limes & garlic, I chose to fill the crate with limes. To create “flow” in the photograph, I added a couple of loose limes and loose garlic cloves off to the side of the bowl of salad. Originally, I thought my olive oil bottle would be the best choice; it wasn’t. You’ll see this in the pics that will follow.
The crate of limes is off in the background. This creates an “S” shaped flow through the photo. Since I wanted the focus on the salad, I blurred the background some and kept the feature in sharp focus. This is called “bokeh,” and it’s usually achieved by using a larger aperture (smaller f-stop number–it’s the inverse. It’s also based on the sq. root of 2…don’t get me started on the math LOL).
Attention also must be paid to what else is in the background. To avoid a “too-tight” composition, I get around this by using a prop backdrop. In this shot, I used a piece of scrap plywood with a nice grain. That way, I don’t have to be overly concerned about anything nasty-looking in the background.
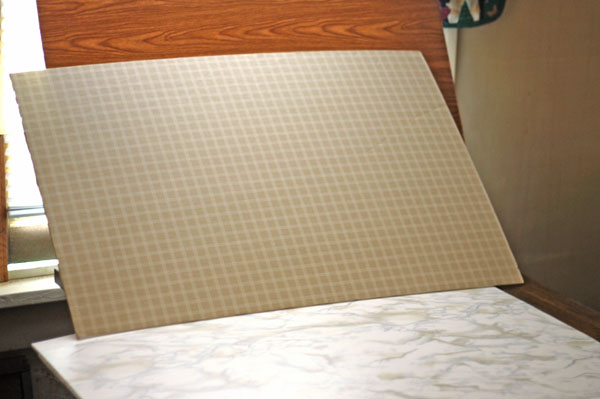
Here are some of my boards for bases and backdrops. These I made with Contact shelf paper and cheap foam boards. In this pic you can see some of the “nasty” background this will avoid…like my window and penguin letterholder.
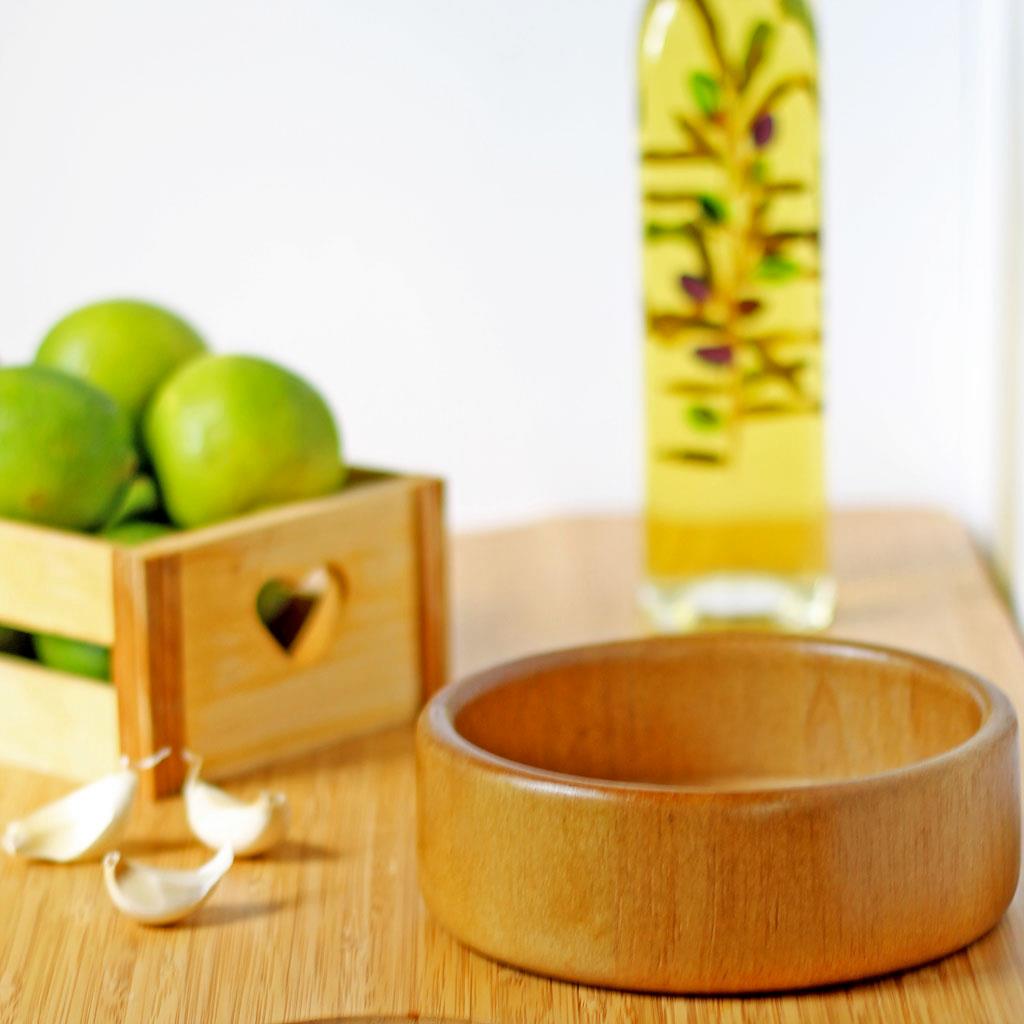
Here’s the first setup I tested. I will always test lighting and placement first. After sleeping on this, I decided to discard the oil carafe as I could not get the entire bottle in the shot, even with a vertical shot, like this one. I also did not like the stark, plain white foam board as a backdrop.
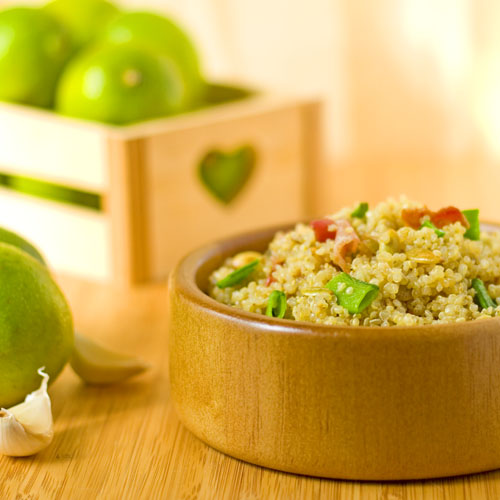
And here’s the finished product after I re-thought the elements. Also notice, the old “rule of thirds” is employed here. You only want 1/3 to 2/3 of your focused item in the shot.
Next installment, I will discuss editing. I use a combination of GIMP (a freebie and a good one), Photoshop (the granddaddy) and Lightroom.


Sylvia (at) Lily's Pad and Petals says
Thanks for the walk-through Judy, never imagined how involved photography was. Somewhat easy to understand after reading this post, but I'll leave photography to the expert (you).
Sylvia
Judy Hannemann says
LOL…talk about sweating small details. I do. Funny when I was writing about the sugar snaps being vibrant green, suddenly the reminder of my husband cooking them popped into my head. We grew them, he'd just picked them and put them on to cook FOR 40 MINUTES when he went back out to the garden. No green left; they were just grey. I ended up tossing them in the compost.
Lillian (My Recipe Journey) says
Thanks! I like ALL your photos, so its nice to see the behind the scenes shot! Post more behind the scenes stuff if possible! Show us your camera, your photo table etc.